Server/Database Tools

Description
I use this setup for both AzerothCore and TrinityCore development. These tools make my life easier as a dev and speeds up the development process.
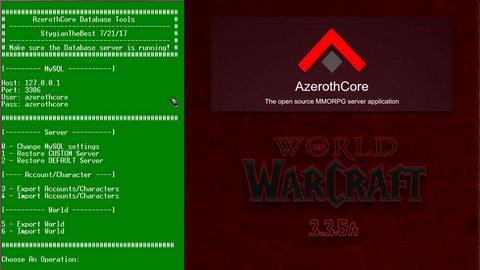
The batch file I created for working with the AzerothCore/TrinityCore databases during development. It allows me to rebuild the database from both the default state and a custom state. It also allows me to backup the current state and archives any existing backups with timestamps allowing me to do staged development and quickly step back to a previous version if needed.
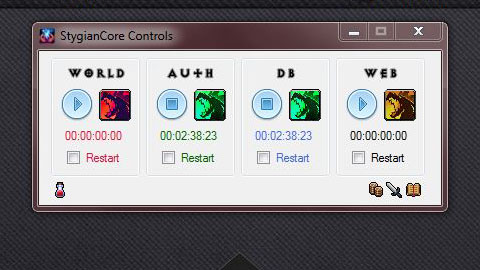
I’ve also included the graphical front-end, Zaxer’s Control Panel 3.1, that I use to run the auth, world, mysql, and apache instances. I made a small hex-edit to this file that makes AzerothCore Tools appear in the title bar.
Features
- A DOS batch file for database backup/restore.
- Supports a default or custom database restore.
- Can backup the current state of each database.
- Archives existing backups.
- Allows you to configure the MySQL connection parameters.
- A graphical front-end - Zaxer’s Control Panel 3.1.
- I did a small hex-edit to display AzerothCore in the title bar.
Installation
- Copy the files/folders into your server’s root.
- AzerothCoreControls.exe is the graphical front-end.
- Run this and setup the paths to your executables.
- AzerothCoreTools.bat is the batch file used for backup/restore of the databases.
- Edit the paths in this batch file to match your server’s path.
- The Tools folder holds the database archives for the default (restore_default.zip) and custom (restore_custom.zip) database states.
- Both restore_default.zip and restore_custom.zip contain the defaults. It’s up to you to add additions for a custom restore.
- I’ve included two optional files in the restoration archives that set default server IP and create a Horde and Alliance guild. These are not needed, but can alleviate a few extra steps after performing a restore.
- Edit the xxxx_xx_xx_MachineName.sql in the restoration archive’s auth folder to set your server IP on restore.
- Edit the xxxx_xx_xx_DefaultGuilds.sql in the restoration archive’s characters folder to set default guilds on restore.
- Users with GUID 1 and 2 must be present and of the proper faction for the guilds to be created.
- You may want to update your default characters database to contain one default player of each faction.
Restoring a database
- Note: The restore_default.zip and restore_custom.zip both contain the database as of 9/21/2017.
- On load, the batch will make sure MySQL is running.
- The batch will check for the existance of the restoration archives before initiating a restore.
- When you initiate a restore, four folders will be created containing the data from the archive.
- restore_custom
- auth (database + custom IP script)
- cfg (config files for the server)
- characters
- world
- restore_custom
- The restore_custom.zip file can be updated and re-zipped as you make modifications to your database.
- A folder named Backup will be created when the batch is run for holding timestamped backups of the databases.
- When a backup is initiated, it will check the folder for existing files in the Backup folder and rename/timestamp them if found.
Workflow
- 99% of the time I’m working with batch created backups or the restore_custom.zip archive.
- The only time I update the restore_default.zip is when new GIT changes to the database are pulled and the default state has changed.
- My typical update process goes like this:
- Initiate a restore of the CUSTOM server.
- Update the database several times with any new modifications testing making sure everything is working as intended.
- Next, I’ll restore the custom world again and re-apply all of those tested updates.
- Now I’ll backup the databases with the batch or export them via HeidiSQL or Navicat.
- Copy the newly created SQL files into the existing restoration archive folders in the Tools folder.
- Zip up the restore_custom folder into a new restore_custom.zip which is now useable with the custom restore option.
Version
- v2017.10.09 - Release

